The Xbox One X remains a solid 4K gaming machine in 2026, but nothing kills a gaming session faster than power issues. Whether the console refuses to boot, displays an ominous orange light, or randomly shuts down mid-match, the power supply unit (PSU) is often the culprit. Unlike its predecessor, the original Xbox One, the One X features an internal PSU, meaning troubleshooting and replacement require a different approach.
This guide breaks down everything about the Xbox One X power supply: how it works, common failure signs, troubleshooting steps, replacement options, and maintenance tips to keep your console running. If you’re dealing with power problems or simply want to understand the hardware better, this is the resource you need.
Table of Contents
ToggleKey Takeaways
- The Xbox One X power supply is internal, requiring console opening for replacement, unlike earlier models that used external power bricks.
- Common Xbox One X power supply failure signs include random shutdowns, orange lights that won’t transition to white, unusual noises, and refusal to boot.
- A full power cycle—unplugging for 30-60 seconds—resolves many apparent power supply issues before considering hardware replacement.
- Proper ventilation with 4-6 inches of clearance on all sides and a quality surge protector rated for at least 1000 joules significantly extends power supply lifespan.
- DIY Xbox One X power supply replacement costs $55-145 with proper tools, while professional repair ranges from $100-220 depending on your location and service provider.
- Before replacing the power supply, verify outlet functionality and cable integrity, as connection issues frequently mimic PSU failures.
Understanding the Xbox One X Power Supply Unit
The Xbox One X’s power delivery system is engineered for high-performance gaming, supporting 4K visuals and demanding titles without breaking a sweat. But when problems arise, knowing how the PSU works helps you diagnose issues faster.
Internal vs. External Power Supply Design
Microsoft made a significant design shift with the Xbox One X by integrating the power supply internally. The original Xbox One and One S both used external power bricks, those chunky blocks that sat between your console and the wall outlet. The One X eliminates that middleman entirely.
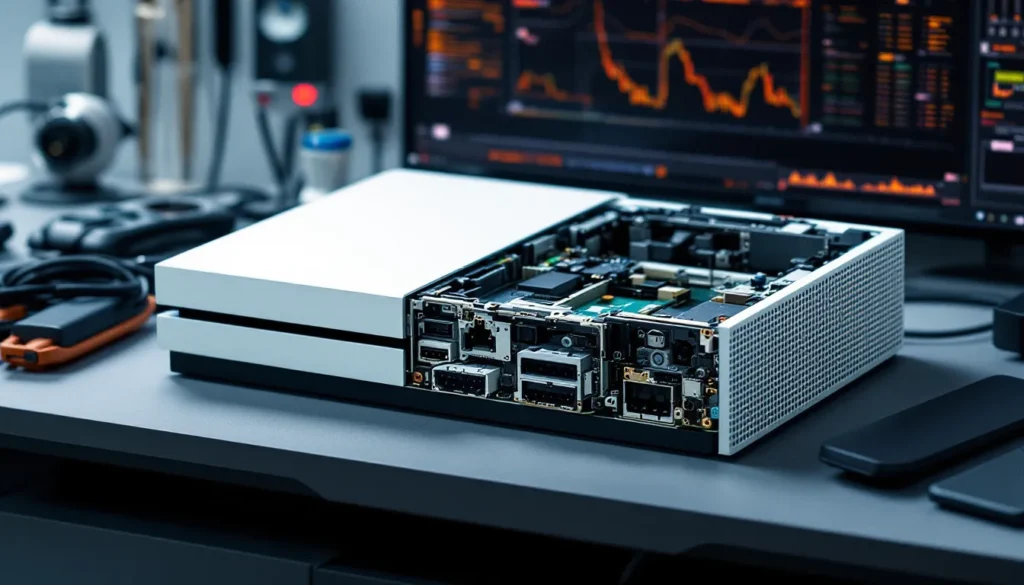
This internal design offers several advantages: cleaner cable management, reduced clutter around your entertainment center, and one less component to fail independently. But, it also means you can’t simply swap out a faulty power brick. If the PSU dies, you’re looking at opening the console or sending it in for repair.
The internal unit sits integrated with the console’s motherboard and cooling system. It’s compact, efficient, and designed to handle the One X’s 245W maximum power draw during intensive gaming sessions. When issues occur, you’ll need to determine whether the problem lies with the PSU itself, the motherboard, or external factors like outlet issues.
Power Specifications and Voltage Requirements
The Xbox One X PSU operates at 100-240V AC, 50/60Hz, making it compatible with global power standards. Maximum power consumption hits 245 watts during peak gaming loads, though typical usage hovers around 150-180W. The unit converts AC power from your wall outlet into the specific DC voltages required by the console’s components.
For reference, the original Xbox One pulled up to 220W, while the more efficient One S maxed out at 150W. The X’s higher power requirement supports its enhanced GPU and CPU, which deliver true 4K gaming at 60fps in supported titles.
Temperature tolerance is rated for operation between 41°F and 95°F (5°C to 35°C). Operating outside this range, especially in hot, poorly ventilated spaces, can stress the PSU and shorten its lifespan. The internal components include multiple safety features: overvoltage protection, short-circuit protection, and thermal shutdown mechanisms that prevent damage when things go wrong.
Common Xbox One X Power Supply Issues
Power supply failures manifest in predictable patterns. Recognizing these symptoms early can save you time, money, and frustration.
Signs Your Power Supply Is Failing
A dying PSU rarely fails instantly, it gives warning signs first. The most common red flags include:
- Intermittent shutdowns: Console powers off during gameplay, especially during graphically intense moments
- Failure to boot: Pressing the power button produces no response, or the console starts then immediately dies
- Unusual noises: Buzzing, clicking, or whining sounds emanating from inside the console
- Overheating: Excessive heat output even during light use, or the console feeling abnormally hot to touch
- Inconsistent power: Console requires multiple power button presses to start, or won’t start unless unplugged and replugged
If you’re experiencing multiple symptoms simultaneously, the PSU is likely on its last legs. Single issues, like one random shutdown, might indicate software glitches or ventilation problems rather than hardware failure.
Orange Light vs. White Light Indicators
The Xbox One X uses LED indicators to communicate power status, and understanding these lights is crucial for diagnosis.
A solid white light means the console is powered on and functioning normally. When the console enters standby mode (instant-on), the light remains dimly lit, indicating background tasks like system updates are possible.
An orange or amber light indicates standby mode or a partial power state. This is normal when the console is set to energy-saving mode or is properly shut down but still plugged in. But, if you press the power button and the light stays orange without transitioning to white, you’ve got a problem.
Common orange light issues include:
- Stuck in standby: Console won’t fully boot, light stays orange
- Flickering orange: Light pulses or flickers, suggesting inconsistent power delivery
- No light at all: Complete power failure, no LED response
If the light stays orange after pressing power, the PSU might be delivering partial voltage but can’t provide enough juice for full boot. This often points to a failing internal power supply or motherboard issue.
Console Won’t Turn On or Powers Off Randomly
These are the two most frustrating power supply issues, and they require different diagnostic approaches.
Console won’t turn on: Start by checking the obvious, is it plugged in securely? Is the outlet working? Try a different outlet or test the current one with another device. If the console shows zero signs of life (no LED, no fan noise, no beep), the PSU is likely dead. But, if you hear a faint click or see a momentary LED flash, the problem might be power distribution to other components rather than total PSU failure.
Random shutdowns: These are trickier to diagnose. If the console powers off during demanding games but runs fine in menus, you might be dealing with thermal issues rather than pure PSU failure. The Xbox One X’s thermal protection will shut down the system to prevent damage if temperatures exceed safe thresholds. But, if shutdowns occur randomly regardless of load, during Netflix streaming, for example, the PSU likely can’t maintain stable voltage under varying conditions.
Random shutdowns can also result from professional repair services being necessary if internal components beyond the PSU are compromised. According to hardware diagnostics research, inconsistent power delivery under load is one of the earliest signs of capacitor degradation in gaming console PSUs.
Troubleshooting Power Supply Problems
Before ordering replacement parts or contacting support, run through these troubleshooting steps. Many apparent PSU failures are actually simpler issues with quick fixes.
Basic Power Cycle and Reset Procedures
The power cycle is your first diagnostic tool. It clears the console’s power capacitors and resets the system to a clean state.
Full power cycle procedure:
- Press and hold the Xbox button on the front panel for 10 seconds until the console fully shuts down
- Unplug the power cable from the back of the console
- Wait at least 30 seconds (some techs recommend 60-120 seconds for thorough capacitor discharge)
- Press the power button 2-3 times while unplugged (this drains residual power)
- Plug the power cable back in firmly
- Press the power button to start the console
If the console boots successfully after this procedure, you likely experienced a temporary software glitch or power management hiccup rather than hardware failure. If problems persist, move to the next steps.
Factory reset considerations: If the console boots but behaves erratically, a factory reset might resolve software-related power management issues. But, don’t jump to this nuclear option immediately, it wipes all local saves and settings.
Checking Cables and Connections
Physical connection problems mimic PSU failures surprisingly often. The Xbox One X uses a standard IEC C7 power cable (figure-8 connector). These cables are notoriously prone to loosening over time, especially if your entertainment center gets bumped or if you frequently move the console.
Cable inspection checklist:
- Remove the power cable and inspect both ends for bent pins, corrosion, or burn marks
- Check the port on the console for debris, dust buildup, or visible damage
- Ensure the cable clicks firmly into place, there should be no wiggle room
- Try a different C7 power cable if you have one available (they’re common for laptop power supplies and other electronics)
- Inspect the cable length for visible damage, kinks, or exposed wiring
Damaged cables can cause intermittent power delivery that perfectly mimics a dying PSU. A $10 replacement cable can save you from unnecessary repairs. If your Xbox One X model came with a non-standard cable variant, verify compatibility before replacing.
Testing Your Power Outlet and Surge Protector
Outlet and surge protector failures are more common than you’d think, especially in older homes or after lightning storms.
Test your power source:
- Plug another high-wattage device (hair dryer, vacuum, space heater) into the same outlet your Xbox uses
- Run the device for several minutes to verify consistent power delivery
- If you’re using a surge protector or power strip, plug the Xbox directly into a wall outlet to eliminate the middleman
- Check if the surge protector has a reset button and try resetting it
- Replace surge protectors older than 3-5 years, their protection degrades over time
Many surge protectors have built-in fuses or circuit breakers that trip during power surges. Once tripped, they deliver inconsistent power or none at all, even though they appear functional. Gaming enthusiasts using quality peripherals know that clean, stable power is critical for consistent performance.
If the console works when plugged directly into the wall but fails with the surge protector, you’ve identified the problem. Replace the surge protector with a quality unit rated for at least 300W to accommodate the One X’s power requirements with headroom.
How to Replace Your Xbox One X Power Supply
If troubleshooting doesn’t resolve the issue, you’re facing a hardware replacement. The internal PSU design makes this more complex than swapping an external brick, but it’s still manageable with the right approach.
Finding Compatible Replacement Power Supplies
The Xbox One X uses a proprietary internal PSU with specific voltage rails and mounting points. You can’t simply drop in a generic ATX computer power supply, it must be designed for the One X.
Compatibility requirements:
- Model number: Look for PSU replacements marked as compatible with Xbox One X (model 1787) specifically
- Voltage specifications: 12V, 5V, and 3.3V rails matching original specs
- Physical dimensions: The PSU must fit the One X’s compact internal chassis
- Connector compatibility: Fan, motherboard, and hard drive connectors must match
Original equipment manufacturer (OEM) parts pulled from donor consoles are often the safest bet. These come from functional Xbox One X units that suffered different failures (dead GPUs, for example) and guarantee perfect compatibility.
When searching online marketplaces or electronics retailers, use specific search terms: “Xbox One X internal power supply” or “Xbox One X model 1787 PSU replacement.” Avoid generic listings that claim compatibility with “all Xbox models”, the One X’s internal design is unique.
Official vs. Third-Party Power Supply Options
You’ve got two main paths: official Microsoft parts or third-party alternatives. Each has trade-offs.
Official Microsoft parts:
- Pros: Guaranteed compatibility, proper certifications, warranty coverage if purchased through authorized channels
- Cons: Higher cost (typically $80-120), limited availability since the One X is out of production
- Where to get them: Microsoft support (if still offering parts), authorized repair centers, or OEM pulls from parts suppliers
Third-party replacements:
- Pros: Lower cost ($40-70), wider availability online
- Cons: Quality varies dramatically, potential compatibility issues, may lack proper safety certifications, shorter lifespan
- Risk factors: Some third-party units use lower-grade capacitors or inadequate thermal management
If you’re comfortable with electronics and want to save money, a well-reviewed third-party option can work. Check seller ratings, read reviews specifically mentioning long-term reliability, and verify return policies. For those who want peace of mind and plan to keep their One X running for years, spending extra on OEM parts makes sense.
Consider checking listings for used Xbox One X consoles with other issues, sometimes buying a parts console is more cost-effective than purchasing individual components.
Step-by-Step Replacement Guide
Replacing the internal PSU requires opening the console, which voids any remaining warranty. Proceed only if you’re comfortable with electronics disassembly. According to Windows Central’s hardware guides, proper static discharge precautions are critical when working with console internals.
Tools needed:
- Torx T8 and T10 security screwdrivers (with center post hole)
- Small flathead screwdriver or plastic pry tools
- Thermal paste (if you disturb the heatsink)
- Anti-static wrist strap (recommended)
- Clean workspace with good lighting
Replacement procedure:
- Power down completely: Unplug the console and wait 5 minutes for capacitors to discharge
- Remove exterior panels: Use the T8 security screwdriver to remove screws around the perimeter. Carefully pry off side panels using plastic tools to avoid scratching
- Disconnect internal cables: The PSU connects to the motherboard via multiple cables. Note their positions before disconnecting. Take photos for reference
- Remove PSU mounting screws: Typically 4-6 screws secure the PSU to the chassis. Use the appropriate Torx bit
- Extract the old PSU: Gently wiggle the unit free, being careful not to damage surrounding components or cables
- Install the new PSU: Align mounting holes and connectors. Secure with original screws. Reconnect all cables firmly
- Reassemble the console: Replace panels and exterior screws in reverse order
- Test before full reassembly: Connect power and test boot before fully closing the case. This saves time if something isn’t connected properly
Critical warnings:
- Never attempt this while the console is plugged in or recently powered
- Don’t force connectors, they should seat firmly but without excessive pressure
- If you removed the heatsink during disassembly, you must reapply thermal paste before reassembly
- Some screws may be different lengths, keep them organized by location
If you’re not confident in your skills, professional repair is the safer option. The cost difference between DIY and professional service narrows when you factor in tools and potential mistakes.
Maintaining Your Xbox One X Power Supply for Longevity
Prevention beats repair every time. A few simple habits can extend your PSU’s lifespan by years.
Proper Ventilation and Cooling Tips
Heat is the number one PSU killer. The Xbox One X generates significant thermal output, and inadequate ventilation accelerates component degradation.
Optimal placement guidelines:
- Maintain at least 4-6 inches of clearance on all ventilated sides (rear and left side intake vents)
- Never enclose the console in a tight cabinet without ventilation holes
- Position the console horizontally for best airflow, vertical stands restrict side intake
- Keep the console away from heat sources (radiators, direct sunlight, other electronics)
- Place on a hard, flat surface rather than carpet or fabric that can block bottom vents
Cleaning routine:
- Dust the exterior vents monthly using compressed air or a vacuum with a brush attachment
- Every 6 months, use compressed air to blow dust out of the rear exhaust vent while the console is off
- If you notice increased fan noise or heat, a deeper internal cleaning may be necessary (requires opening the console)
Room temperature matters more than most people realize. Consistently gaming in a room above 80°F (27°C) stresses thermal management systems. If possible, game in climate-controlled environments, especially during summer months.
Protecting Against Power Surges
Power surges from lightning strikes, grid switching, or electrical faults can instantly destroy a PSU. Surge protection is non-negotiable for expensive electronics.
Protection best practices:
- Use a quality surge protector with at least 1000 joules of protection (2000+ joules is better)
- Look for UL 1449 certification and a low clamping voltage (330V or 400V)
- Replace surge protectors every 3-5 years, protection degrades with each surge absorbed
- Consider a UPS (uninterruptible power supply) if you experience frequent power outages or brownouts
- Never daisy-chain surge protectors, plug directly into the wall outlet
A quality surge protector typically costs $30-60 but can save you hundreds in replacement costs. Models with indicator lights show when protection is active versus degraded. For those maintaining multiple consoles or considering setup optimization, invest in multi-outlet surge protection with adequate spacing between outlets.
When to Contact Microsoft Support
Some situations warrant professional help rather than DIY attempts.
Contact support if:
- Your console is still under warranty (opening it voids coverage)
- You’ve tried all troubleshooting steps without success
- The console shows signs of electrical damage (burning smell, smoke, or visible charring)
- You’re uncomfortable opening the console yourself
- Multiple components appear to be failing simultaneously
Microsoft’s official support can provide diagnostic services, repair estimates, and in some cases, out-of-warranty replacement options. Response times vary, but they typically offer mail-in repair services with 2-3 week turnarounds.
For out-of-warranty consoles, third-party repair shops may offer faster and cheaper service. Research local options with strong reviews for console repair. Pure Xbox forums often have community recommendations for reputable repair services by region.
Cost Considerations and Where to Buy
Understanding the financial landscape helps you make informed decisions about repair versus replacement.
Average Price Range for Replacement Units
Prices vary based on part source, quality, and whether you’re doing the work yourself or paying for professional installation.
DIY replacement costs:
- OEM/official parts: $80-120 for the PSU alone
- Third-party replacements: $40-70, quality varies
- Tools (if you don’t own them): $15-25 for security Torx bits
- Total DIY cost: $55-145 depending on part choice
Professional repair costs:
- Independent repair shops: $100-180 including parts and labor
- Microsoft official repair (if available): $150-220
- Total professional cost: Varies by region and shop reputation
Comparison point: A used Xbox One X in good condition typically sells for $200-300 in 2026. If repair costs approach $150+, consider whether buying a replacement console or upgrading to a Series X makes more financial sense, especially if your One X is several years old with potential for other failures.
Factors affecting price:
- Location: Urban areas typically have more repair options and competitive pricing
- Part availability: As the One X ages, OEM parts become scarcer and more expensive
- Console condition: If other issues exist (thermal paste dried out, failing hard drive), additional repairs inflate costs
Best Retailers and Online Marketplaces
Knowing where to shop saves money and reduces the risk of counterfeit or incompatible parts.
Recommended sources:
eBay: Largest selection of both new and OEM pull parts. Use search terms like “Xbox One X power supply 1787” and filter by seller ratings (98%+ positive). Check listing photos carefully and read return policies. Many sellers offer tested parts from donor consoles.
Amazon: Good for third-party replacements with customer reviews. Sort by ratings and read negative reviews first, they reveal common failure points. Prime shipping is convenient but doesn’t guarantee part quality.
AliExpress: Budget options from overseas suppliers. Expect 2-4 week shipping and verify seller ratings. Quality is hit-or-miss: best for experienced users comfortable with potential troubleshooting.
iFixit: Sells quality replacement parts with repair guides. Premium pricing but excellent customer service and return policies. Good choice for first-time DIY repairs.
Local electronics repair shops: Often source OEM parts and may sell them separately. Building relationships with local techs can provide ongoing support and advice.
Console parts specialists: Websites dedicated to gaming console parts (search “Xbox One X parts supplier”) often have the most knowledgeable support and best compatibility guarantees.
Avoid: Generic electronics retailers (Best Buy, Walmart) rarely stock internal PSU components. Auction sites without buyer protection. Listings without clear photos or specifications.
Before purchasing, verify the seller’s return policy. A 30-day return window gives you time to test the part and ensures you’re not stuck with a dud. Compare shipping costs, PSUs are relatively heavy, and international shipping can add $15-30 to the total.
Conclusion
The Xbox One X power supply is a robust component, but it’s not immortal. Understanding how it works, recognizing failure symptoms early, and knowing your repair options keeps your console alive longer. Whether you choose to troubleshoot, DIY replace, or seek professional repair depends on your comfort level with electronics and budget constraints.
Most power issues respond to basic troubleshooting, power cycles, cable checks, and outlet testing. When replacement becomes necessary, weigh the costs carefully against the console’s age and condition. The One X remains a capable 4K gaming machine in 2026, making repair worthwhile if the rest of the system is healthy.
Proper maintenance, ventilation, surge protection, and regular cleaning, prevents most PSU failures before they happen. For those committed to keeping their One X running, these habits pay dividends in extended lifespan and consistent performance.