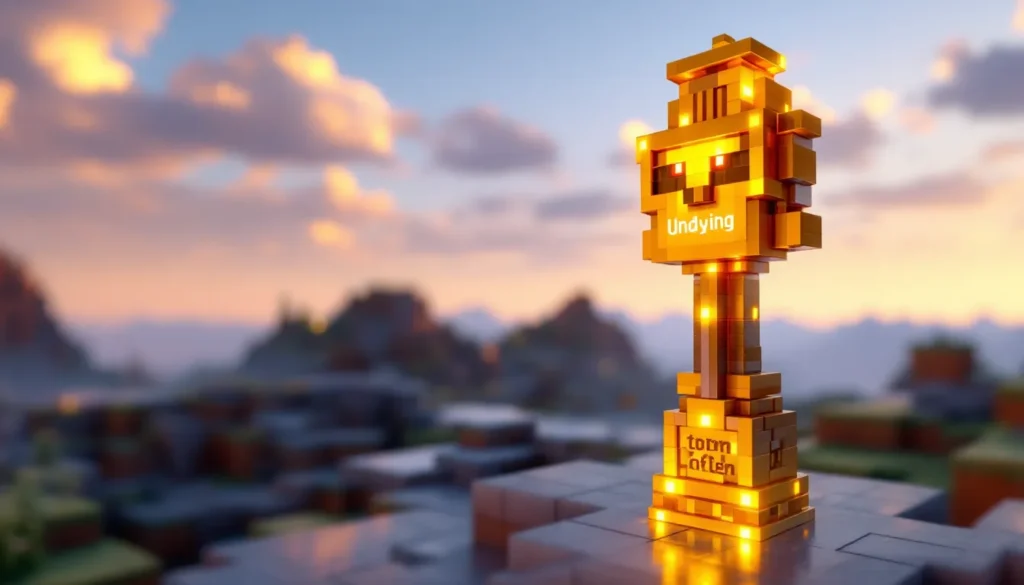
Designing custom banners in Minecraft has always been part art, part puzzle. Whether you’re decorating a castle, marking territory on a multiplayer server, or just showing off your creativity, banners let you inject personality into your builds. But let’s be honest, stacking six layers of patterns in-game through trial and error can be tedious, especially when you’re trying to replicate a complex design or logo.
That’s where banner makers come in. These tools let players visualize, tweak, and perfect banner designs before spending a single piece of wool or dye. They’ve become essential for builders, server admins, and anyone who wants their banners to look clean without the guesswork. This guide breaks down what banner makers are, which tools are worth using, and how to get the most out of them in 2026.
Table of Contents
ToggleKey Takeaways
- A Minecraft banner maker is a web-based or mod-powered tool that lets players design custom banners outside the game with live preview, eliminating the need for in-game trial and error.
- Using a banner maker saves time by providing access to pre-made template designs and allowing instant visualization of complex multi-layer patterns before committing any wool or dye resources.
- Minecraft banners are limited to six pattern layers plus a base color, requiring strategic design choices and creative layering to achieve detailed looks like flags, logos, and pixel art.
- Top banner maker tools like Planet Minecraft’s Banner Maker, Minecraft Tools’ Banner Generator, and NeedCoolShoes are free, browser-based, and support the latest Minecraft versions with features like crafting recipe export and /give commands.
- Professional-looking banners prioritize high contrast between colors, simplicity over layer saturation, and matching the design palette to your build aesthetic for visual cohesion.
- Banner designs can be easily shared via crafting recipes, shareable URLs, /give commands, or NBT data export, making collaboration and distribution across servers seamless.
What Is a Minecraft Banner Maker?
A Minecraft banner maker is a digital tool, usually web-based or mod-powered, that allows players to design custom banners outside the game. Instead of placing a loom and cycling through pattern combinations in-game, these tools provide a visual interface where players can select colors, apply patterns, and layer designs in real time.
Most banner makers display a live preview of the banner as you build it, showing exactly how each layer interacts with the others. Once you’re happy with the design, the tool generates a crafting recipe or command that you can use to recreate the banner in Minecraft. Some advanced tools even export NBT data or provide direct /give commands for multiplayer servers.
These tools don’t modify your game files or require installation unless you’re using a mod-based solution. Web-based generators work on any device with a browser, making them accessible whether you’re on PC, console (via a second screen), or even mobile. They’re especially popular among server owners and creative builders who need consistent, repeatable designs across multiple banners.
Why Use Banner Makers Instead of Crafting In-Game?
Crafting banners directly in Minecraft is perfectly functional, but it’s also slow and unforgiving. If you’re experimenting with complex designs, the loom interface doesn’t give you a clear sense of how patterns will stack until you commit materials. Banner makers solve that problem and offer several other advantages.
Save Time with Pre-Made Designs
One of the biggest draws is the library of pre-made templates most banner makers include. Want a national flag, a pirate skull, or a checkerboard pattern? These are already built and ready to copy. You can browse hundreds of community-uploaded designs, find one that fits your needs, and have the crafting recipe in seconds.
This is especially useful for server admins setting up spawn areas, faction banners, or event decorations. Instead of spending hours perfecting a design manually, they can grab a template, tweak a color or two, and move on.
Visualize Complex Patterns Before Crafting
Minecraft’s banner system allows up to six layers of patterns, and the order matters. If you place a gradient before a border, the result looks different than if you reverse them. Banner makers let you drag, reorder, and preview every layer instantly.
This trial-and-error process is painless in a browser but frustrating in-game, where each mistake costs wool and dye. For intricate designs, like pixel art logos or multi-color emblems, being able to test combinations without resource loss is a game-changer.
Best Minecraft Banner Maker Tools Available
There’s no shortage of banner makers out there, but quality varies. Some are outdated, others lack key features, and a few are bloated with ads. Here’s a breakdown of the most reliable options as of early 2026.
Online Web-Based Banner Generators
Planet Minecraft’s Banner Maker remains one of the most popular free tools. It’s browser-based, requires no login, and supports all banner patterns introduced up to Minecraft 1.21. The interface is clean: a banner preview on the left, pattern and color selectors on the right, and a crafting recipe output at the bottom. You can also browse thousands of user-submitted designs and grab the recipe with one click.
Minecraft Tools’ Banner Generator is another solid choice. It’s lightweight, mobile-friendly, and includes a color picker that matches Minecraft’s exact dye palette. The tool also lets you export designs as images or share them via URL, which is handy for collaborating with other players or posting designs to forums.
NeedCoolShoes is a veteran in the space and still gets regular updates. It supports both Java and Bedrock editions, though some advanced patterns (like Snout or Flow) may only appear in Java. The site also hosts a gallery of featured designs, sorted by popularity and theme.
For those who prefer modding guides and community-driven tools, several modders have built custom banner editors with additional features like undo/redo, pattern search, and batch export.
In-Game Tools and Mods
If you’re playing modded Minecraft, mods like BannerMaker+ (available for Fabric and Forge) add an in-game interface that mimics web-based generators. You open a GUI, design your banner, and it’s added to your inventory instantly. This is ideal for creative mode builders who don’t want to alt-tab.
WorldEdit also supports banner manipulation through commands. If you’re working on large-scale builds or server maps, you can clone and paste banners with custom NBT data, making it easy to replicate designs across thousands of blocks.
How to Use a Minecraft Banner Maker: Step-by-Step Tutorial
Using a banner maker is straightforward, but understanding the workflow helps you design faster and avoid common pitfalls. Here’s a walkthrough using a typical web-based tool.
Selecting Your Base Color
Every banner starts with a base color, which determines the background. This is the only layer that doesn’t count toward the six-pattern limit, so choose it carefully, it’s the foundation for everything else.
In the tool, you’ll see a palette of 16 colors matching Minecraft’s dye options. Click the one you want, and the banner preview updates instantly. If you’re recreating a real-world flag or logo, compare the Minecraft palette to your reference image and pick the closest match.
Keep in mind that some designs look better with a white or black base, since lighter colors make dark patterns pop and vice versa.
Adding Patterns and Layers
Once your base is set, start adding patterns. Most tools list all available patterns in a menu: stripes, gradients, borders, shapes, and special patterns like Creeper Charge or Skull and Crossbones.
Click a pattern to apply it to the banner. You’ll then choose a dye color for that layer. The preview updates immediately, showing how the new pattern overlays the existing design. If you don’t like the result, most tools let you delete or reorder layers by dragging them in the layer stack.
Order matters. A Border applied after a Gradient will frame the gradient, but applying it before will result in the gradient covering part of the border. Experiment with layer order until the design looks right.
Exporting Your Design and Crafting Recipe
When you’re satisfied with the design, scroll down to the crafting recipe section. The tool displays the exact sequence of loom operations needed to recreate the banner in-game, including which dye and pattern item to use at each step.
Some generators also provide a /give command. Copy this and paste it into your Minecraft chat (creative mode or server admin privileges required) to spawn the banner instantly. If you’re playing survival, screenshot the recipe or write down the steps, you’ll need to gather the dyes and pattern items manually.
A few tools even let you export the design as a PNG image or save it to your account for future reference.
Understanding Banner Patterns and Layer Limits
Minecraft’s banner system is flexible, but it has hard limits. Knowing these constraints helps you design smarter and avoid frustration.
The Six-Layer Rule Explained
Every banner can hold a maximum of six pattern layers, not counting the base color. This means you can apply up to six different patterns or colors on top of the background. If you try to add a seventh layer in-game, the loom won’t accept it.
This limit forces you to be strategic. Complex designs often require creative use of overlapping patterns. For example, combining a Stripe Top with a Stripe Bottom and a Fess (horizontal stripe) can create the illusion of more layers than you’re actually using.
Some players work around the limit by combining multiple banners in a build, placing them side by side to create a larger, multi-banner mural. This technique is common in spawn areas and faction halls.
Special Pattern Items and How to Obtain Them
Most banner patterns are available by default in the loom, but a few require special pattern items to unlock. These are single-use consumables that you place in the loom alongside the banner and dye.
Here’s a quick reference for the special patterns as of Minecraft 1.21:
- Creeper Charge: Crafted by combining paper and a creeper head. The creeper head is a rare drop (2.5% base chance, higher with Looting).
- Skull and Crossbones: Crafted with paper and a wither skeleton skull. Farm wither skeletons in the Nether for the skull.
- Flower Charge: Crafted with paper and an oxeye daisy. Easy to obtain: oxeye daisies grow in plains and flower forests.
- Thing: Requires an enchanted golden apple and paper. This is the rarest pattern since enchanted golden apples are found only in loot chests or crafted (pre-1.9) in older worlds.
- Snout: Crafted with paper and a piglin banner pattern item, which is obtained by bartering with piglins in the Nether.
- Globe: Trade with a master-level cartographer villager to get the pattern item.
- Flow and Guster: Introduced in Minecraft 1.21, these are obtained from trial chambers and ancient city loot chests respectively.
If you’re using a detailed game guide to farm these items, prioritize the ones that fit your design theme. Not every banner needs special patterns, but they add unique flair when used well.
Creative Banner Design Ideas and Inspiration
Staring at a blank banner can be intimidating. Here are some proven design categories to jumpstart your creativity.
National Flags and Emblems
Flags are among the most popular banner designs. With six layers, you can accurately recreate flags like the United States, Japan, Canada, and many others. Simple tricolor flags (like France or Italy) are easy to make with vertical or horizontal stripes, while more complex designs (like the UK or Brazil) require careful layering of shapes and borders.
Many banner makers include flag templates in their galleries, so you don’t have to reinvent the wheel. These are great for themed builds, role-play servers, or just showing national pride in your base.
Game and Pop Culture References
Pixel art logos from other games, movies, or TV shows translate surprisingly well to banners. Think Batman symbols, Pokémon team logos, Zelda crests, or superhero emblems. The six-layer limit means you can’t do ultra-detailed art, but iconic symbols with bold shapes and limited colors work perfectly.
Some players even recreate memes or internet culture references. A simple Loss.jpg meme banner or an Among Us crewmate are easy to execute and instantly recognizable to the right audience.
Custom Clan and Server Logos
If you’re running a multiplayer server or part of a faction, custom banners are essential for branding. Design a unique emblem that represents your group’s identity, animals, abstract shapes, or initials all work well.
Once you’ve settled on a design, distribute the crafting recipe to all members so everyone can wear matching capes (by placing the banner in the chest plate slot with an Elytra) or hang the banner in their bases. Consistency across a server creates a strong visual identity and makes your faction immediately recognizable.
Tips for Creating Professional-Looking Banners
Not all banners are created equal. Here’s how to elevate your designs from amateur to polished.
Use contrast wisely. Dark patterns on light backgrounds (or vice versa) are easier to read from a distance. If your banner looks muddy or unclear, try swapping in a higher-contrast color.
Keep it simple. Six layers sounds like a lot, but clutter kills clarity. The best designs often use three or four well-chosen patterns rather than maxing out the layer count. Negative space (areas of the base color showing through) can be just as impactful as filled areas.
Test in-game lighting. A banner that looks great in a well-lit creative world might be hard to see in a dimly lit survival base or Nether hub. After designing, place the banner in various lighting conditions to ensure it’s readable everywhere.
Match your build palette. If your base uses mostly stone and wood tones, a neon-colored banner will clash. Choose banner colors that complement your existing blocks for a cohesive aesthetic.
Iterate and refine. Your first draft rarely nails it. Use the banner maker to try different color combinations, reorder layers, or swap patterns until the design feels right. The ability to experiment without resource cost is your biggest advantage.
Common Mistakes to Avoid When Making Banners
Even experienced players trip up on these pitfalls. Here’s what to watch out for.
Ignoring layer order. Players often assume the order doesn’t matter if the patterns don’t overlap, but Minecraft applies each layer sequentially. A border added last will frame everything beneath it, while a border added first might be partially covered by later patterns. Always preview the final result.
Forgetting the six-layer cap. It’s easy to get carried away in a banner maker and design something with eight or nine layers, only to realize you can’t replicate it in-game. Keep an eye on the layer counter, and if you hit six, start thinking about which layers you can merge or eliminate.
Using the wrong edition’s patterns. Some patterns exist in Java Edition but not Bedrock, and vice versa. If you’re designing for a Bedrock server, double-check that the pattern is available in that version. Most modern gaming tech how-tos specify edition differences, but not all tools do.
Overcomplicating simple designs. A flag or logo doesn’t need to be pixel-perfect to be recognizable. If you’re spending 20 minutes tweaking a single layer, step back and ask if it’s actually improving the design. Sometimes a rougher, simpler version reads better at a distance.
Not saving your work. If you’re using a web-based tool without an account, your design might disappear if you close the tab. Bookmark the URL (if the tool supports sharing via link), screenshot the crafting recipe, or export the design before you leave the page.
How to Share and Import Banner Designs
Once you’ve created a killer banner, you’ll probably want to share it with friends or import someone else’s design into your world.
Sharing via crafting recipe: The simplest method is to screenshot or copy the step-by-step loom instructions and send them to other players. This works across all platforms and doesn’t require any commands or NBT editing.
Using /give commands: If you have access to commands (creative mode or server admin), most banner makers generate a /give command with full NBT data. Paste this into chat, and the banner appears in your inventory. You can then duplicate it in survival by combining it with a blank banner in a crafting table.
URL sharing: Some tools (like NeedCoolShoes) encode your design into a shareable URL. Anyone with the link can open the same design in their browser and grab the recipe. This is ideal for posting designs to Reddit, Discord, or forum threads.
Exporting to NBT editors: Advanced users can export the banner’s NBT data and edit it with tools like NBTExplorer or MCEdit. This is overkill for most designs but useful if you’re batch-editing hundreds of banners for a large-scale map or server.
Mod-based sharing: Some modpacks include in-game clipboard tools that let you copy and paste banner data directly between worlds or servers. If you’re already running mods, this is the fastest way to move designs around.
Conclusion
Banner makers have turned what used to be a tedious trial-and-error process into a streamlined, creative workflow. Whether you’re a survival player decorating your base, a server admin outfitting spawn with faction emblems, or a creative builder pushing the limits of six-layer designs, these tools save time and unlock design possibilities that would be brutal to iterate on in-game.
The best part? Most of these tools are free, browser-based, and constantly updated to match the latest Minecraft versions. Pair a good banner maker with a solid understanding of layer limits and pattern mechanics, and you’ll be cranking out professional-looking banners in minutes instead of hours. Now go design something worth hanging on a wall.