The Xbox One S brought a sleek redesign and 4K video support when it launched, but it also introduced a significant change under the hood: an internal power supply. Unlike the original Xbox One with its bulky external power brick, the One S integrated everything into the console itself. That’s great for aesthetics and portability, but it also means troubleshooting and replacing a faulty PSU is a different beast entirely.
If your Xbox One S won’t power on, randomly shuts down mid-session, or shows strange LED behavior, the internal power supply could be the culprit. This guide breaks down how the One S power system works, common issues you’ll encounter, troubleshooting steps that actually work, and your options for repair or replacement. Whether you’re dealing with a dead console or just want to keep your system running smoothly, here’s everything you need to know about the Xbox One S power supply in 2026.
Table of Contents
ToggleKey Takeaways
- The Xbox One S internal power supply differs fundamentally from the original Xbox One’s external brick, requiring console disassembly for repairs, but using a standard and affordable C7/C8 power cable.
- Common Xbox One S power supply issues include failure to power on, orange light symptoms, and random shutdowns during gameplay—all solvable through troubleshooting steps like proper power cycling and outlet verification.
- DIY PSU replacement costs $30–$60 in parts, while professional repairs range from $60–$149, making the choice between repair and upgrade economically dependent on console condition and sentimental value.
- Proper ventilation, dust removal every 3–6 months, and protection against power surges through a UPS significantly extend your console’s lifespan and prevent premature PSU failure.
- If your Xbox One S shows multiple failure signs like burning smells, clicking sounds, or intermittent boot loops, the internal power supply has likely failed and professional replacement is recommended.
Understanding the Xbox One S Internal Power Supply
How the Internal PSU Differs from the Original Xbox One
The original Xbox One relied on an external power brick, a hefty, fan-cooled unit that sat between your wall outlet and the console. That brick handled AC-to-DC conversion and supplied the console with regulated power. The Xbox One S ditched this entirely, integrating the power supply unit directly into the console’s chassis.
This shift meant a smaller footprint and cleaner cable management, but it also introduced new challenges. When the external PSU failed on the original model, you could swap it out independently. With the One S, a PSU failure requires opening the console itself, something most gamers aren’t equipped to do. The internal design also means heat management became more critical, as the PSU shares internal space with the APU, RAM, and other components.
Another key difference: the One S uses a standard C7 or C8 figure-8 power cable (also called a shotgun cable), the same type you’d find on some laptops and AV equipment. This cable is cheap and widely available, which is a plus if you suspect cable damage rather than a full PSU failure.
Power Specifications and Requirements
The Xbox One S internal PSU is rated for 100-240V AC, 50/60Hz input, making it compatible with power grids worldwide without a voltage converter. The PSU outputs regulated DC power at multiple voltages to different components inside the console, including 12V and 5V rails for the motherboard, storage, and cooling fans.
Total power draw varies by workload. During typical gameplay, the One S pulls between 60-90 watts. That spikes to around 110-120 watts under heavy load, think 4K video streaming, HDR gaming, or running backward-compatible titles that stress the system. Standby mode (Instant-On) consumes roughly 12-15 watts, a detail that matters if you’re calculating long-term energy costs or troubleshooting random wake behavior.
The PSU also includes overvoltage, undervoltage, and short-circuit protections. These safeguards are designed to prevent damage from power surges or unstable outlets, but they can also trigger false shutdowns if your home electrical setup is marginal. If you’re plugging into an old or overloaded circuit, the console’s protections might kick in prematurely.
Common Xbox One S Power Supply Problems
Console Won’t Turn On at All
This is the classic dead console scenario. You press the power button, and nothing happens, no LED, no fan spin, no startup chime. Often, gamers assume the worst: a fried motherboard or dead PSU. Before you panic, check the obvious culprits: is the power cable firmly seated at both ends? Is the outlet working? Try plugging a lamp or phone charger into the same outlet to confirm power delivery.
If the outlet is fine and the cable is snug, the issue is likely internal. The PSU’s internal fuse may have blown due to a power surge, or a component on the power board has failed. In rare cases, the front power button itself can malfunction, preventing the console from receiving the power-on signal even though the PSU is functional.
Some users have reported professional Xbox One repair services diagnosing cold solder joints on the PSU board, connections that degrade over time due to thermal cycling. This is especially common in consoles that have been in service since 2016-2017.
Orange or White Light Issues
The Xbox One S LED can display orange (standby) or white (powered on) states. An orange light that won’t turn white when you press the power button usually indicates the console is receiving standby power but can’t complete the boot sequence. This can point to a PSU issue, but it can also signal problems with the motherboard, hard drive, or even corrupted firmware.
A flickering or pulsing orange light often means the console is stuck in a boot loop or trying to wake from Instant-On mode but failing. According to hardware diagnostics covered by TechRadar, this behavior sometimes stems from capacitor degradation on the PSU board, where voltage regulation becomes unstable under load.
If the LED turns white briefly then immediately goes back to orange, the console is detecting a fault during POST (power-on self-test) and shutting down protectively. This can be PSU-related, but you’ll want to rule out RAM or APU issues before committing to a PSU replacement.
Random Shutdowns During Gameplay
You’re deep into a ranked match or story mission, and suddenly the console powers off without warning, no error message, no gradual slowdown, just instant black screen. Random shutdowns are one of the most frustrating power-related issues, and they can have multiple causes.
Overheating is the first suspect. If the internal cooling system is clogged with dust or the thermal paste on the APU has dried out, the console may hit thermal limits and shut down to prevent damage. But, if the console is cool to the touch and well-ventilated, the PSU is a more likely culprit. Failing capacitors or degraded voltage regulation can cause the PSU to drop voltage under load, triggering a protective shutdown.
Another scenario: if you’re using a rechargeable controller and notice shutdowns coincide with controller charging or USB accessory use, the PSU’s 5V rail may be overtaxed. The One S has limited USB power delivery, and drawing too much current can stress the PSU.
Some gamers have also experienced shutdowns tied to specific game titles or system updates. In those cases, the issue is usually firmware-related rather than hardware, but distinguishing between the two requires methodical testing.
Troubleshooting Xbox One S Power Issues
Power Cycling Your Console Properly
A proper power cycle clears the console’s cache and resets all internal states, often resolving temporary power glitches. Here’s the correct procedure: with the console on, hold the power button for 10 seconds until it shuts down completely. The LED should turn off, and you’ll hear the fan wind down.
Unplug the power cable from the back of the console and wait at least 30 seconds. This allows residual power to drain from the PSU’s capacitors. Plug the cable back in, then press the power button to restart. If the console boots normally, the issue was likely a software or cache-related hiccup rather than a hardware failure.
If the problem persists after a power cycle, you’re looking at a deeper issue. Power cycling won’t fix a failing PSU component, but it’s a zero-cost first step that rules out simple glitches.
Checking Your Power Outlet and Surge Protector
Microsoft officially recommends plugging the Xbox One S directly into a wall outlet rather than through a surge protector or power strip. The console’s internal PSU already has surge protection built in, and adding another layer can sometimes cause issues, especially with cheaper surge protectors that don’t maintain clean power delivery.
If you’re using a surge protector and experiencing power issues, try bypassing it. Plug the console straight into the wall and test. If the problem disappears, the surge protector was either faulty or creating a ground loop.
Also check the outlet itself. Older homes with two-prong, ungrounded outlets can cause erratic behavior. If possible, use a three-prong grounded outlet. You can test outlet voltage with a cheap multimeter, it should read close to 120V in North America or 230V in Europe. Significant deviation (more than 10%) can stress the PSU.
Inspecting the Power Cable for Damage
The figure-8 power cable on the Xbox One S is durable, but it’s not invincible. Check the entire length of the cable for kinks, cuts, or exposed wire. Pay special attention to the ends where the cable enters the plug and the console connector, these are stress points where internal wires can fray.
Bend the cable gently near each end while the console is plugged in (but off). If the LED flickers or you hear crackling, the cable has internal damage. Replacement cables are cheap, under $10 on Amazon or at most electronics retailers. Make sure you’re getting a C7 (two-prong) or C8 (two-prong with ground) cable depending on your console’s port configuration.
Some third-party cables are poorly shielded and can introduce electrical noise, leading to instability. Stick with reputable brands or official Microsoft replacements if you’re replacing the cable. As noted in reviews on PCWorld, cable quality matters more than most gamers realize, especially for power delivery.
When to Replace Your Xbox One S Power Supply
Signs That Indicate PSU Failure
Knowing when a PSU is truly dead versus just acting up can save you time and money. Here are the definitive red flags:
- No LED activity at all, even after trying multiple outlets and cables
- Burning smell or visible scorch marks near the power inlet or ventilation holes
- Clicking or buzzing sounds from inside the console when plugged in, even when powered off
- Intermittent power-on followed by immediate shutdown, repeating in a loop
- Console powers on but peripherals don’t receive power (USB ports dead, no controller sync)
If you’re seeing multiple symptoms from this list, especially the burning smell or audible clicking, the PSU has likely failed. Capacitors, MOSFETs, or voltage regulators on the power board can degrade over time, particularly in consoles that have seen heavy use or exposure to heat.
One less obvious sign: if your console only works in certain orientations (horizontal but not vertical, for example), you may have a loose internal connection or a failing solder joint on the PSU board. This is rare but documented in forums and repair communities.
Warranty Coverage and Microsoft Support Options
The Xbox One S originally shipped with a one-year limited warranty from Microsoft, covering manufacturing defects and hardware failures. As of 2026, most Xbox One S consoles are well outside that window, many units are 7-10 years old. But, if you purchased an extended warranty through Microsoft or a retailer, check your coverage. Some extended plans cover power-related failures.
Microsoft’s official support page offers a device service request option. You can submit a claim online, and they’ll provide a prepaid shipping label if your console qualifies for out-of-warranty service. Microsoft’s flat-rate repair fee for out-of-warranty consoles has historically been around $99-$149, though pricing can vary by region and availability in 2026.
Be aware that Microsoft’s repair service may replace your console with a refurbished unit rather than fixing your original. If you have a special edition or sentimental attachment to your specific console, this may not be ideal. Also, they won’t transfer your hard drive, so back up your data if possible before shipping.
If your console is part of a known hardware defect batch, Microsoft occasionally extends coverage. Search the official Xbox support forums or Twitter for any service bulletins related to power supply failures in specific manufacturing runs.
Replacement Options and Where to Buy
Official Microsoft Repair Services
Microsoft’s official repair service is the safest route if you’re not comfortable with DIY fixes or third-party shops. The process is straightforward: visit the Xbox support site, sign in with your Microsoft account, select your console, and submit a service request. You’ll receive a prepaid shipping label via email within 1-2 business days.
Once Microsoft receives your console, turnaround time is typically 7-14 days, though it can stretch longer during peak periods (holidays, major game launches). You’ll get email updates at each step, received, diagnosed, repaired, shipped back.
The main downside is cost and data loss. Out-of-warranty repairs aren’t cheap, and as mentioned, they may swap your console instead of repairing it. If you have digital games tied to your account, you can redownload them, but saved game data not backed up to the cloud is gone unless you paid for Xbox Live Gold or Game Pass Ultimate (which includes cloud saves).
Third-Party Repair Shops and DIY Replacement
Local repair shops specializing in game consoles are often faster and sometimes cheaper than Microsoft’s official service. A reputable shop can diagnose PSU issues within an hour and complete a replacement the same day or next. Prices typically range from $60-$120 depending on parts and labor.
The key is finding a trustworthy shop. Look for businesses with good reviews on Google or Yelp, preferably ones that specialize in gaming hardware rather than general electronics. Ask upfront whether they use OEM (original equipment manufacturer) parts or third-party replacements. OEM parts are more reliable but harder to source in 2026 given the console’s age.
DIY replacement is possible if you’re comfortable with disassembly and soldering (or at least screwdriver work). Replacement PSU boards can be found on eBay, AliExpress, or specialty sites like iFixit for $30-$60. But, the Xbox One S disassembly is moderately difficult, T8 and T10 Torx screws, plastic clips, ribbon cables, and thermal paste reapplication are all involved.
If you’re considering upgrading to newer hardware, weigh the cost of repair against putting that money toward a Series S or Series X. The used Xbox One S market has dropped significantly, making repair less economically sensible unless you have specific attachment to the console.
Cost Comparison: Repair vs. Replace
Let’s break down the numbers as of early 2026:
- DIY PSU replacement parts: $30-$60
- Local repair shop: $60-$120
- Microsoft official repair: $99-$149
- Used Xbox One S (working): $80-$150 on eBay or Facebook Marketplace
- New Xbox Series S: $299 (often on sale for $249)
If your One S is otherwise in great shape, has sentimental value, or you’ve invested in physical accessories, repair makes sense at the lower end of that range. A DIY fix for $40 beats buying used. But if you’re looking at $120+ for a professional repair, you’re approaching the price of a used replacement console, or a significant chunk of a Series S upgrade.
Also consider opportunity cost. A week without your console while it’s at Microsoft versus an hour at a local shop versus an afternoon doing it yourself. If you’re mid-campaign in a game or your console is your primary streaming device, downtime matters.
For collectors or limited edition consoles (like the Gears of War 4 or Project Scorpio editions), repair is almost always worth it regardless of cost. These consoles have value beyond their function, and finding a matching replacement is difficult.
How to Replace the Xbox One S Internal Power Supply
Tools and Safety Precautions
Before you crack open your Xbox One S, gather the necessary tools and take safety seriously. You’ll need:
- T8 and T10 Torx security screwdrivers (with center hole for security screws)
- Plastic prying tools or guitar picks for separating shell clips
- Thermal paste (for reassembly)
- Isopropyl alcohol (90%+ concentration) and lint-free cloths for cleaning old thermal paste
- ESD wrist strap (optional but recommended)
- Small containers for organizing screws by step
Safety first: unplug the console and let it sit for at least 30 minutes before opening. Capacitors inside the PSU can hold a charge even when unplugged. Work on a non-conductive surface like a wooden table, not carpet. If you’re prone to static discharge, use an ESD strap grounded to a metal object.
Never attempt this repair if the console is still under warranty, you’ll void it. Also, be realistic about your skill level. If you’ve never opened a console before, watch multiple disassembly videos first (iFixit and YouTube have several detailed walkthroughs). Rushing or forcing clips can result in broken plastic or damaged ribbon cables.
Step-by-Step Replacement Guide
Step 1: Remove the console’s bottom panel. With the console upside-down, peel back the warranty sticker (if still present) and remove the single T10 Torx screw beneath it. Use a plastic prying tool to gently separate the bottom shell from the side clips, working your way around the perimeter.
Step 2: Once the bottom is off, you’ll see the metal chassis. Remove all T8 Torx screws securing the chassis (typically 6-8 screws). Keep track of screw lengths, some are longer than others. Lift the chassis out carefully, minding the Wi-Fi antenna cable attached to the side.
Step 3: Disconnect the Wi-Fi antenna cable and any ribbon cables attached to the motherboard. Use a spudger or plastic tool to lift the cable connectors straight up, don’t pull at an angle. Set the top shell assembly aside.
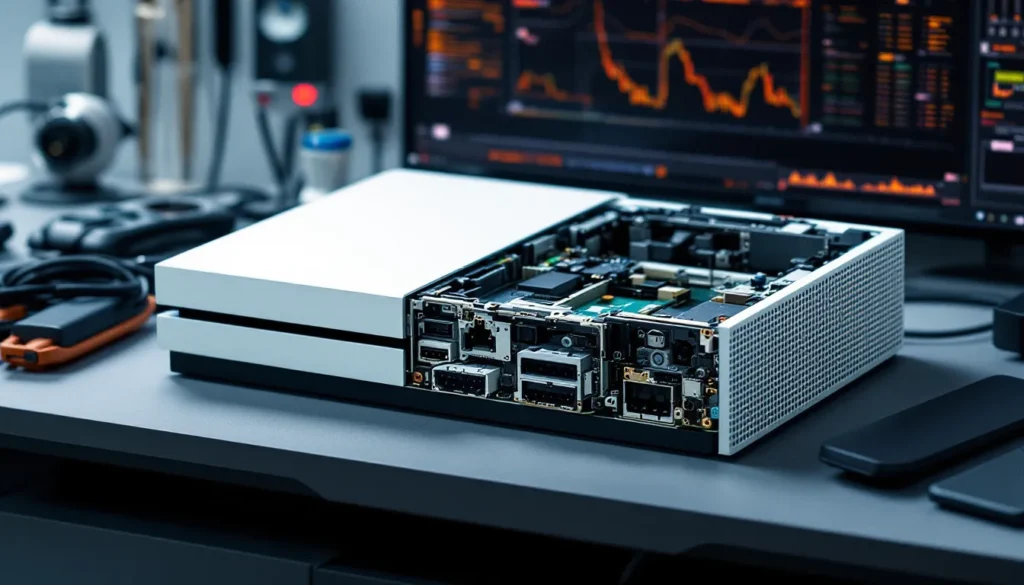
Step 4: The PSU is now visible, mounted on the left side of the console (when viewed from the front). It’s a rectangular metal-enclosed unit with a large capacitor and several connectors leading to the motherboard. Disconnect the main power connector (usually a multi-pin Molex-style plug) by pulling straight out.
Step 5: Remove the T8 Torx screws holding the PSU bracket to the chassis. There are typically 3-4 screws. Lift the PSU out carefully, it may have thermal pads adhered to the underside that stick slightly.
Step 6: Install the replacement PSU by reversing the process. Ensure all connectors are fully seated, partial connections will cause boot failures. Replace any thermal pads if they came with the new PSU.
Step 7: Before reassembling fully, perform a test boot. Connect the power cable and try powering on with the console still open (be careful not to touch any exposed components). If the LED lights up and fans spin, you’re good. Power off, unplug, and reassemble.
Step 8: When reattaching the heatsink or APU assembly (if you removed it), clean off old thermal paste with isopropyl alcohol and apply a fresh pea-sized amount. Reassemble the chassis, reconnect all cables, and screw everything back together in reverse order.
Take your time. First-time disassemblies often take 60-90 minutes. Have a video guide open on a phone or tablet for reference. If at any point something doesn’t feel right, a connector won’t seat, a screw won’t thread, stop and double-check before forcing it.
Maintaining Your Xbox One S for Optimal Power Performance
Proper Ventilation and Cooling
The Xbox One S generates a fair amount of heat, especially during extended play sessions or 4K streaming. Poor ventilation puts extra strain on the PSU and can accelerate capacitor aging. Place your console in an open area with at least 4-6 inches of clearance on all sides. Never enclose it in a cabinet or place it directly on carpet.
Horizontal placement is generally better for airflow than vertical, as the intake and exhaust vents align more naturally with convection currents. If you do place it vertically, use the official vertical stand to ensure stability and proper vent clearance.
Dust accumulation is the silent killer. Every 3-6 months, use compressed air to blow out the vents (console off and unplugged). Hold the can upright to avoid propellant liquid spray, and use short bursts. If you’re comfortable opening the console (as detailed in the replacement section), a more thorough internal cleaning can extend lifespan significantly. Gaming setups with quality peripherals and proper maintenance tend to last years longer than neglected systems.
Protecting Against Power Surges
Even though the Xbox One S has internal surge protection, it’s not foolproof. A direct lightning strike or major grid event can overwhelm those protections. If you live in an area with frequent storms or unstable power, consider a UPS (uninterruptible power supply) rather than a basic surge protector.
A UPS provides battery backup during outages and conditions incoming power to smooth out voltage fluctuations. Models in the 600-900VA range are sufficient for the Xbox One S and a TV. Brands like APC and CyberPower are reliable. This setup not only protects your console but also prevents data corruption from sudden shutdowns.
Avoid plugging the console into power strips shared with high-draw appliances like space heaters, refrigerators, or air conditioners. These can cause voltage sags when they cycle on, potentially triggering protective shutdowns or stressing the PSU over time. Tests by Tom’s Hardware have shown that consistent, clean power delivery extends PSU lifespan significantly across all electronics, not just gaming hardware.
If you’ve had a recent power outage or surge in your area and your console starts acting strange afterward, perform a full power cycle as described earlier. Sometimes the internal protections trip and need a reset, even if no permanent damage occurred.
Conclusion
The Xbox One S internal power supply design was a double-edged sword, sleeker and more portable, but harder to troubleshoot and repair when things go wrong. In 2026, many of these consoles are reaching the end of their expected lifespan, and PSU failures are becoming more common as components age.
If you’re facing power issues, methodical troubleshooting is your best friend. Start with the simple stuff, cables, outlets, power cycles, before committing to a repair. And when you do decide to repair, weigh your options carefully. A DIY fix makes sense if you’re handy and the parts are affordable. Professional repair is worth it for consoles with sentimental or collectible value. But if the numbers don’t add up, upgrading to a Series S or finding a working used One S might be the smarter play.
Whatever route you choose, proper maintenance from here on out will help you squeeze every last hour out of your console. Keep it cool, keep it clean, and give it stable power. Your Xbox One S has plenty of gaming left in it, if you treat it right.