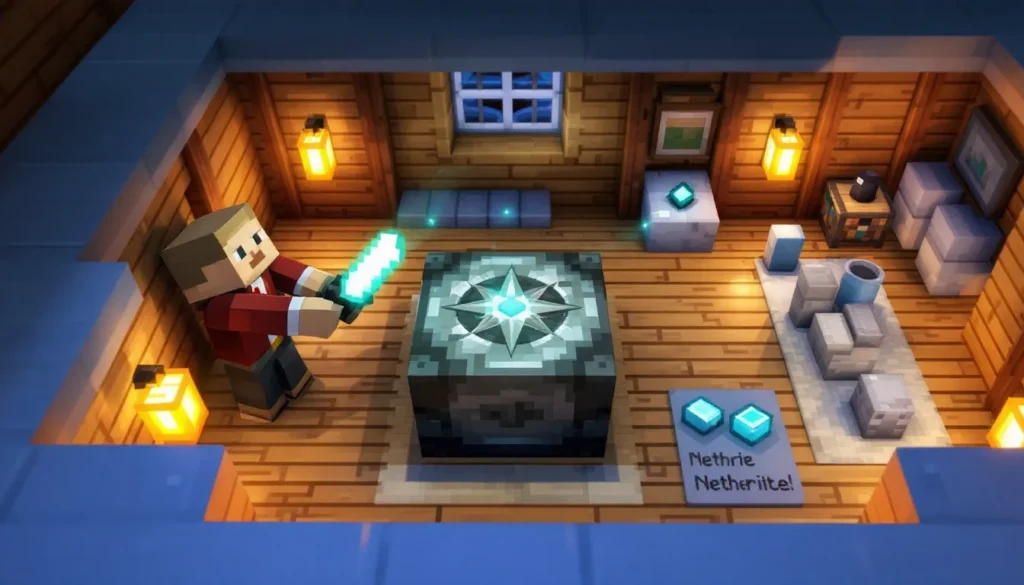
Composters are one of those utility blocks in Minecraft that players either completely overlook or turn into an absolute workhorse once they understand the value. If you’re manually hunting skeletons for bone meal or spending emeralds on wandering traders, you’re doing it the hard way. A composter converts your farm waste, seeds, saplings, crops, even kelp, into free bone meal, which is essential for accelerating crop growth, breeding animals, and creating those massive tree farms.
Beyond bone meal production, composters serve a critical role in villager trading systems. They’re the job site block for farmers, which means setting one down near an unemployed villager instantly creates a trading partner who’ll buy your carrots and sell you golden carrots or glistening melons. Whether you’re building an automated farm setup or just want a steady supply of bone meal without the grind, knowing the composter minecraft recipe and how to maximize its efficiency is a game-changer. This guide covers everything: crafting, placement, item success rates, automation tricks, and common pitfalls to avoid.
Table of Contents
ToggleKey Takeaways
- A composter minecraft recipe requires only 7 wooden slabs of any wood type, making it one of the easiest utility blocks to craft early game.
- Composters convert farm waste, seeds, crops, and kelp into bone meal—eliminating the need to hunt skeletons or spend emeralds on traders.
- High-efficiency items like hay bales (85% success) and cake (100% success) fill composters faster than low-tier items like seeds (30% success).
- Placing a composter near an unemployed villager instantly creates a farmer who trades valuable items like golden carrots and glistening melons.
- Automated composter systems using hoppers enable passive bone meal production and transform your farm into a self-sustaining resource generator.
What Is a Composter in Minecraft?
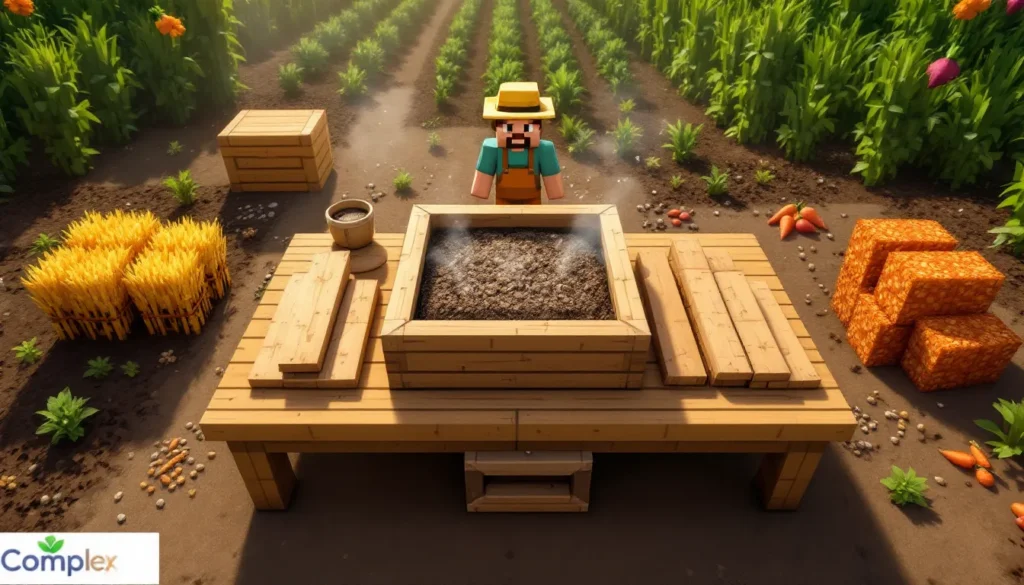
A composter is a utility block that converts organic materials, plants, crops, food items, and other compostable goods, into bone meal. It’s essentially a recycling bin for your farm surplus. Instead of cluttering chests with stacks of seeds or burning excess wheat, you toss them into a composter and gradually fill it up until it produces a bone meal.
Composters have seven layers of compost visible inside the block. Each time you add a compostable item, there’s a chance the layer increases by one. Once all seven layers are filled, the composter is ready to harvest, and you’ll get one bone meal per full cycle. The process is silent, doesn’t require fuel, and works in any biome or dimension.
Beyond bone meal generation, composters function as job site blocks for villagers. Place a composter near an unemployed villager, and they’ll claim it and become a farmer. Farmer villagers offer trades like golden carrots, apples, and suspicious stew, making composters doubly useful in trading hall setups. The block itself is non-flammable and has a blast resistance of 0.6, so it’s safe near lava but won’t survive a creeper blast.
How to Craft a Composter: Recipe and Materials
Required Materials for the Composter Recipe
Crafting a composter is straightforward and doesn’t require rare resources. You’ll need:
- 7 wooden slabs (any type)
Slabs can be crafted from planks of any wood variety: oak, spruce, birch, jungle, acacia, dark oak, mangrove, cherry, bamboo, or crimson/warped stems. You don’t need to match wood types, mixing oak slabs with birch slabs works fine. Each plank yields two slabs when crafted, so you’ll need four planks total to get seven slabs (you’ll have one slab left over).
Step-by-Step Crafting Instructions
- Gather wood: Chop down trees to collect logs.
- Convert logs to planks: Place logs in your crafting grid. Each log produces four planks.
- Craft slabs: Arrange three planks horizontally in a crafting table to get six slabs. Repeat until you have at least seven slabs.
- Open your crafting table and arrange the seven slabs in a “U” shape:
- Top row: slab, slab, slab
- Middle row: slab, (empty), slab
- Bottom row: slab, (empty), slab
- Collect your composter from the output slot.
The minecraft compost bin has no crafting variants, there’s only one recipe, and it always produces the same block regardless of wood type used.
Where to Find Composters Naturally
If you’d rather skip crafting, composters generate naturally in village farms. Every village with a farm plot has a chance to spawn at least one composter, and larger villages may have several scattered across different farm areas.
Villages where composters spawn:
- Plains villages
- Savanna villages
- Taiga villages
- Snowy tundra villages
- Desert villages (less common due to fewer farm structures)
Composters are typically placed near crop fields, often adjacent to hay bales, water sources, or farmer villager workstations. Since villages are common in most Minecraft worlds, it’s often faster to loot a composter from a village than to craft one, especially early game when you’re low on wood.
You can break a composter with any tool or even your hand, and it drops as an item instantly. There’s no need for a specific tool, and the block doesn’t require Silk Touch. If a farmer villager is using the composter as their job site, breaking it will reset their profession unless they’ve been traded with at least once (which locks their trades).
How to Use a Composter: Turning Waste Into Bone Meal
What Items Can You Compost?
Composters accept a wide range of organic items, from flowers and saplings to full-grown crops and baked goods. Not every plant-based item works, though, sticks, bamboo, and dead bushes, for instance, aren’t compostable.
Compostable item categories:
- Seeds: wheat seeds, beetroot seeds, melon seeds, pumpkin seeds, torchflower seeds, pitcher pods
- Saplings: all tree saplings (oak, birch, spruce, etc.)
- Flowers and plants: dandelions, poppies, grass, ferns, lilacs, sunflowers, sea pickles, lily pads, moss carpets
- Crops: wheat, carrots, potatoes, beetroot, nether wart, sweet berries, glow berries, cocoa beans
- Leaves: any tree leaves, azalea leaves, mangrove leaves
- Food items: bread, baked potatoes, cookies, cake, pumpkin pie, hay bales, dried kelp blocks
- Miscellaneous: mushrooms, mushroom blocks, vines, moss blocks, hanging roots, spore blossoms, big dripleaves
Items like meat, fish, bones, and non-organic materials (stone, ores, etc.) cannot be composted. For a detailed breakdown of farming techniques and crop management, many players reference comprehensive farming guides that cover both vanilla and modded setups.
Composting Efficiency: Success Rates by Item
Not all compostable items have the same chance of increasing the compost level. Minecraft assigns each item a success rate ranging from 30% to 100%. Higher-value items (like hay bales or cake) have better odds than low-tier items (like seeds or saplings).
Success rate tiers:
- 30% chance: seeds (wheat, beetroot, melon, pumpkin), saplings, grass, sweet berries, glow berries, kelp, dried kelp, leaves, small flowers (dandelion, poppy, etc.)
- 50% chance: cactus, dried kelp block (wait, this is actually 50%, not 30%), melon slices, sugar cane, tall grass, vines, nether sprouts, weeping vines, twisting vines
- 65% chance: apples, beetroot, carrots, cocoa beans, ferns, flowers (lilac, rose bush, sunflower), lily pads, melons, potatoes, pumpkins, sea pickles, wheat, crimson/warped fungi, moss carpets, small dripleaf, azalea, flowering azalea, moss block, hanging roots, mangrove roots, spore blossom, wheat (actually 65%)
- 85% chance: baked potatoes, bread, cookies, hay bales, mushroom blocks, nether wart blocks, warped wart blocks, big dripleaf
- 100% chance: cake, pumpkin pie
Using high-efficiency items like hay bales (85%) or cake (100%) fills composters much faster than spamming seeds. But, since seeds are usually abundant and nearly free, most players default to composting excess seeds from wheat farms.
Understanding the Composting Process
When you right-click (or use the interaction button) on a composter with a compostable item, the game rolls the dice based on that item’s success rate. If successful, the compost level increases by one, and you’ll see the block’s contents rise slightly. If it fails, the item is consumed, but the level stays the same.
Each composter has seven levels. Once the seventh level is reached, the composter’s top layer turns into a rich brown texture, and bone meal is ready to collect. Right-click the full composter to harvest one bone meal, and the composter resets to empty.
Key mechanics:
- You can only add one item at a time (no shift-clicking entire stacks).
- Hoppers can insert items into composters from above or the side, making automation possible.
- Hoppers below a composter will extract bone meal automatically when it’s ready.
- Composters work in all dimensions (Overworld, Nether, End).
Best Items to Use for Fast Bone Meal Production
If your goal is maximum bone meal output with minimal input, prioritize items with high success rates and easy availability. Here are the top choices:
1. Hay Bales (85% success, bulk craftable)
Hay bales are crafted from nine wheat each, which makes them expensive if you’re low on crops. But if you have an automated wheat farm, hay bales are one of the most efficient compost items. Nine wheat can also be composted individually (65% each), but consolidating into hay bales saves clicks and time in manual setups.
2. Kelp / Dried Kelp Blocks (50% success, infinite and renewable)
Kelp grows infinitely in ocean biomes and can be harvested with zero replanting. Dried kelp blocks (crafted from nine dried kelp) have a 50% success rate, which isn’t the highest, but the sheer volume you can produce makes kelp farms one of the best passive compost minecraft fuel sources. Plus, kelp doubles as a smelting fuel.
3. Cake (100% success, but expensive)
Cake requires three wheat, two sugar, one egg, and three milk buckets, which makes it impractical for composting unless you’re automating chicken farms and sugar cane. The 100% success rate is appealing, but the resource cost doesn’t justify it for most players.
4. Moss Blocks and Moss Carpets (65% and 30%, respectively, renewable with bone meal)
Moss blocks can be farmed by applying bone meal to a single moss block, which spreads moss to adjacent stone. This creates a renewable loop: use bone meal to grow moss, compost the moss, get bone meal back. It’s not perfectly efficient (you’ll lose some bone meal in the process), but it’s a clever semi-renewable system.
5. Seeds from Wheat Farms (30% success, infinite byproduct)
Wheat farms produce seeds as a byproduct, and they’re otherwise useless in large quantities. Their 30% success rate is low, but since you’re getting them for free, it’s pure profit. Many players build automatic seed composters that feed excess seeds into composters via hoppers.
Pro tip: If you’re running multiple farms, dedicate one composter per farm type. For example, a kelp farm composter, a wheat farm composter, and a tree farm composter (using saplings and leaves). This keeps your bone meal production steady without manual sorting.
Using Composters to Create Farmer Villagers
How Job Site Blocks Work in Minecraft
Villagers without a profession will claim the nearest unclaimed job site block and adopt the corresponding profession. Composters are the job site block for farmer villagers. Once a villager claims a composter, they’ll wear a straw hat and offer farming-related trades.
Key rules:
- Only unemployed villagers (those with green coats and no profession) can claim job sites.
- A villager must be able to pathfind to the composter and stand next to it.
- If you trade with a villager even once, their profession locks permanently. Breaking their job site afterward won’t reset them.
- If you haven’t traded yet, breaking the composter will turn them back into an unemployed villager, and they can claim a new job site.
Setting Up a Farmer Trading Station
Farmer villagers are among the most useful traders in the game. They buy common crops (wheat, carrots, potatoes, beetroot, pumpkins, melons) and sell rare or useful items like golden carrots (best food for saturation), glistening melons (for potions), and suspicious stew.
Steps to create a farmer trading hall:
- Trap an unemployed villager: Use boats, minecarts, or build a small pen to keep them in place.
- Place a composter within their pathfinding range (within 16 blocks and accessible).
- Wait for the green particles: The villager will approach the composter and claim it, transforming into a farmer.
- Trade to lock their offers: Once you trade, their profession and trades are locked, even if you break the composter.
- Repeat for multiple farmers: Each composter can only be claimed by one villager, so you’ll need one composter per farmer.
Many advanced players combine farmer villagers with automatic crop farms to create closed-loop systems where crops are harvested, sold to villagers, and the emeralds fund other trades. For more on villager mechanics and trading optimization, experienced players often consult detailed breakdowns of trade tables and profession behavior.
Creative Uses and Tips for Composters
Automatic Composting Systems
Hoppers make composters even more powerful by automating the entire input and output process. Here’s how to build a simple auto-composter:
Basic setup:
- Place a hopper facing into the top or side of a composter.
- Place a chest above or next to the input hopper to feed items.
- Place a second hopper underneath the composter to catch bone meal.
- Connect the output hopper to a chest for bone meal collection.
Advanced setup (multi-composter array):
- Line up 5–10 composters in a row.
- Use a hopper minecart on a rail loop or a hopper chain to distribute items evenly.
- Collect bone meal from all composters into a single chest using hopper lines.
Automated composters pair beautifully with crop farms that overproduce seeds or with kelp farms that generate infinite fuel and compost material. Some players even integrate composters into zero-tick farms (though zero-tick mechanics were patched in Java 1.16+ and Bedrock 1.18+).
Integrating Composters Into Your Farm Design
Composters don’t just serve a functional role, they can enhance your build aesthetics too. Here are some design ideas:
- Rustic farm aesthetic: Place composters near hay bales, barrels, and farmland to create a lived-in farming village look.
- Vertical farms: Stack composters on different levels of a multi-story farm, with hoppers feeding from each crop layer.
- Hidden farms: Bury composters underground with hopper networks feeding them from above, keeping your surface area clean.
- Villager trading zones: Cluster composters in a trading hall to create multiple farmer villagers, visually reinforcing the agricultural theme.
Because composters are only one block tall, they fit neatly into tight spaces and can be placed side-by-side without clipping. They also don’t emit light, so they won’t interfere with mob spawning mechanics if you’re building near spawner-based farms. Builders who focus on base design and functionality often reference creative farm layouts for inspiration when planning multi-purpose builds.
Common Mistakes to Avoid When Using Composters
Even though composters are simple, there are a few pitfalls that catch players off guard:
1. Trying to compost non-organic items
Bones, bone blocks, and bone meal itself can’t be composted. Neither can sticks, bamboo, or dead bushes. If you’re trying to compost something and it’s not working, double-check the item category.
2. Forgetting to collect bone meal
A full composter won’t auto-eject bone meal. If you don’t harvest it (or don’t have a hopper underneath), the composter stays full and won’t accept new items. This can stall your entire composting operation if you’re running an automated system.
3. Placing composters out of villager pathfinding range
If you want a villager to claim a composter, it needs to be within 16 blocks and accessible by walking. Floating composters or those behind walls won’t be claimed.
4. Over-relying on low-efficiency items
Composting seeds at 30% success means you’ll need roughly 23 seeds to fill a composter (seven layers, each with a ~30% chance). That’s a lot of clicking. If you’re manually composting, prioritize higher-efficiency items like hay bales or bread.
5. Breaking a composter mid-fill
If you break a composter before it’s full, you lose all progress and don’t get any bone meal. Always wait for the seventh layer to complete before harvesting.
6. Not using hoppers for automation
Manual composting is tedious. If you have the iron, hopper-based systems save massive amounts of time and let your farms run passively.
7. Ignoring composter placement in trading halls
If you place multiple composters too close together, villagers may claim the wrong one, messing up your organized trading layout. Space them out or use barriers to control villager movement.
Conclusion
Composters are a deceptively powerful utility block that every Minecraft player should integrate into their farm and trading systems. Whether you’re turning kelp into bone meal to speed up tree growth, recycling wheat seeds from a massive crop farm, or setting up a villager trading hall full of farmers, the composter minecraft recipe is one of the simplest crafts with the highest long-term payoff.
The key is understanding what does a composter do in minecraft beyond the basics: it’s not just a bone meal generator, it’s a resource multiplier, a villager profession tool, and a cornerstone of automated farming setups. Pair composters with hoppers for hands-off operation, prioritize high-efficiency compostable items when possible, and don’t sleep on the value of farmer villagers for golden carrots and emerald trades.
With the strategies and tips in this guide, you’ll never waste another seed or spend another hour hunting skeletons for bones. Your farms will be cleaner, your bone meal supply endless, and your villagers happily employed. Now get out there and start composting.